
Thursday, September 27, 2012
Hockey Cookies
While the NHL season is currently in doubt, local arenas are abuzz with youngsters of all ages taking to the ice. These cookies were to celebrate the home opener of the Bradford Bulldogs Minor Midget A boys game last Saturday night. Personalized for each player, these cookies can easily be adapted for any sports jersey.


Thursday, September 13, 2012
Shabby Chic Cake
Please note - I no longer accept cake orders, focusing instead on custom decorated sugar cookies.
Ali is a giver. I sensed that the minute I met her last year at our planning meeting for her mother's 50th birthday/Mickey Mouse themed party last year. A detail-oriented organizer, she threw her mother a terrific party, complete with a pretty nice Mickey cake. (http://www.sweethandmade.blogspot.ca/2011/05/mickey-mouse-cake.html) She is also a new aunt to twins and is very involved in their lives, despite the fact that these little boys live hours away. She tends to do for everyone before she does something for herself, but hopefully she knows how important she is to her family and how much they all love her! Her mom wanted a special cake for her birthday this year, in their favourite flavours - brown sugar marble for the cake and red velvet for the cupcakes. She loves shabby chic style, so I used that as design style. Happy birthday Ali!
Ali is a giver. I sensed that the minute I met her last year at our planning meeting for her mother's 50th birthday/Mickey Mouse themed party last year. A detail-oriented organizer, she threw her mother a terrific party, complete with a pretty nice Mickey cake. (http://www.sweethandmade.blogspot.ca/2011/05/mickey-mouse-cake.html) She is also a new aunt to twins and is very involved in their lives, despite the fact that these little boys live hours away. She tends to do for everyone before she does something for herself, but hopefully she knows how important she is to her family and how much they all love her! Her mom wanted a special cake for her birthday this year, in their favourite flavours - brown sugar marble for the cake and red velvet for the cupcakes. She loves shabby chic style, so I used that as design style. Happy birthday Ali!
 |
| I love the look of these large flowers and the pearl accents. |
Tuesday, September 4, 2012
My first cakes
As my skills have improved over the years, I thought that today I thought I would share some of my first cakes, not all of them made by me, but some of them downright hilarious!
Here is my first birthday cake. I guess my mom wanted to keep it simple, but to me it looks like a store-bought flan with some whipped cream. This is what you call "semi-homemade". I'm sure we all enjoyed it, the boy in red sure looks happy about it!
.jpg)
By the time I turned six, I had had my share of the cakes my mom could get at the local pastry shops. Whipped cream, fresh fruit, light sponge cake - yuck! So, my ingenious mom would get me an ice cream cake. I think there was some sort of mocha flavour, which I didn't like either! I don't think she knows that.
 |
| I still own that tray. |
.jpg) |
| Blowing out the candles! When my mom tells my girls about my desire for ice cream cakes, she always says "ice cake", because in Dutch ice cream is "ijs", so my kids must wonder if she just slapped a icicle on a plate or something! |
 |
| Check out the Holly Hobby napkins. |
 |
| 39 cents for a bottle of pop! |
This is the cake my mom made for my brother's 13th birthday. You might have guessed he played the trumpet. You never know where the inspiration will come from! Lol!

This my mom's 50th birthday cake. I think my sister-in-law made it with my "help". I think I helped with placing the jujubes.
.jpg)
In 1981 I wanted to make my mom's birthday cake. I had visions of this work of art I was going to carry out - a dark chocolate cake with white frosting. I turned to my sister-in-law for help, she bought the cake mix and the frosting and let me do all the work in her kitchen. Except, I forgot to grease the pan, and the cake just fell apart when I tried to remove it from the pan. I perservered and frosted a crumbly mess. My SIL had a vanilla cake mix and chocolate frosting in the cupboard and so we made that one too and this time we did grease the pan.
 |
| Here I am trying to frost the "crumble" cake. |
 |
| Here are the two finished cakes. |
 |
| Blowing out the candles on the ugly cake. |
 |
| Enjoying the beauty of the good cake! |
Moving right along, it is now 19 years later and my oldest daughter was turning 4. For her party, we went with a games theme, inspired by the fabulous Martha Stewart. Here is the cake Martha made...

And here is my version! Unbelievably horrible!! I am having a hard time admitting I made this. But it tasted great, with my first ever lemon curd and Swiss meringue buttercream! Some of the features I now cringe at are the foil covered cookie sheet, the sloppy edges, the muted colours... wow!
.JPG) |
| And the photography! Obviously not my husband's work! |
Three years later I made this cake for my youngest. I use this picture in my desktop slideshow and everytime it comes up and laugh at the lopsided edges and the writing and the colours and bulge between the layers. The kids are cute, though!
.JPG)
.JPG) |
| When the sprinkles started to go into the edge of this Tupperware container, I decided to make it part of the decorating design. Ingenious, I know! |

Wednesday, August 15, 2012
40th Birthday Guitar Cake
To celebrate his 40th birthday, Fab's wife Nadia wanted a special cake that featured Fab's beloved Fender guitar. The planning for the cake involved secret meetings and cheques left under doormats, which was a first for me! We had to figure out how to make a small cake feature his guitar (a sculpted cake would just be too large) and I think the 2 dimensional guitar on the cake board was a pretty great compromise! I love how the cake turned out and I think it proves that even small and simple cakes can be amazing! Devil's food cake with strawberry Swiss meringue buttercream.


Wednesday, August 1, 2012
Lighthouse Cake for 75th Birthday Celebration
More and more repeat customers and friends contact me for a cake order, saying they happily volunteered to get the cake for their special family occasion - because they know they will get the oohs and aahs when they present the cake and again when it gets eaten!
This special cake was no exception. To celebrate his parent's 75th birthdays, David and his wife asked me create the Donaghadee lighthouse in cake. Originally from the town of Donaghadee in Ireland, this was meant to be a special link to their past.

The base was created out of carrot cake with a delicious cream cheese frosting and covered in fondant, the lighthouse was made out of crispy squares. I covered the cake board in piping gel that I tinted to a pale blue-green and added orange bouys, the "visitors--berths" sign and the lighthouse details.

The cake travelled over 200 kilometers to a beautiful cottage on 12 Mile Lake in Haliburton, Ontario where the family gathered for a long weekend of celebration.

The cake was a hit! It received the expected oohs and aahs and a few tears of joy before being enjoyed by all!
This special cake was no exception. To celebrate his parent's 75th birthdays, David and his wife asked me create the Donaghadee lighthouse in cake. Originally from the town of Donaghadee in Ireland, this was meant to be a special link to their past.

The base was created out of carrot cake with a delicious cream cheese frosting and covered in fondant, the lighthouse was made out of crispy squares. I covered the cake board in piping gel that I tinted to a pale blue-green and added orange bouys, the "visitors--berths" sign and the lighthouse details.

The cake travelled over 200 kilometers to a beautiful cottage on 12 Mile Lake in Haliburton, Ontario where the family gathered for a long weekend of celebration.

The cake was a hit! It received the expected oohs and aahs and a few tears of joy before being enjoyed by all!
Thursday, July 12, 2012
Beauty and the Beast's Belle Cake
To celebrate her birthday, Dakota and her friends gathered at Toronto's Four Seasons Centre for the Performing Arts where they watched a live production of Beauty and the Beast! Later, the girls and their families gathered at a nearby restaurant to eat and celebrate with cake. This Beauty and the Beast inspired cake was commisioned by Dakota's mom to help celebrate at the restaurant after the show. (Thanks to Beautiful Kitchen for the inspiration for Belle!)


The cake was a delicious Devil's food cake filled with bittersweet chocolate ganache and covered in Swiss meringue buttercream! I received a note from Dakota's mom; apparently Belle was "so real looking that Dakota let out a squeal...thanks Laura (and the ganache was FAB)."
Wednesday, June 13, 2012
Fairy Cake and Cookies
A few months ago I received an email from a mom in Whitby. She had found a picture of my fairy cupcake tower online and was smitten http://www.sweethandmade.blogspot.ca/2011/03/fairy-cupcake-topper.html. She had already ordered a birthday cake from a local baker but was hoping I would be willing to make the fairies to place on her daughter's cake. After a few emails we finally talked by phone and during that conversation she decided to forego her deposit to the original baker and asked me to make the entire cake. Now, Whitby is about 120 kilometers from my bakery and usually way, way out of my delivery area, but we really connected and I was very excited to make this darling cake for her.

Also included in the order was matching sugar cookies. To match the blue butterflies on the fairies, the white and yellow flowers on the cake and the toadstools, I created these deliciously sweet cookies.

Friday, April 27, 2012
Fish Shaped Cake
I was given freedom to design what I wanted when asked to create a cake for Andrew's 40th birthday. When I was told he liked fishing, I knew exactly what I would be making!'

After covering the cake board with fondant (something I always do to ensure a beautiful finish), I carved it to look like a wooden planks. Next, I baked and layered a delicious strawberry cake; yellow cake with fresh strawberry slices, Swiss meringue buttercream and strawberry compote. I shaped the cake to look like a chubby trout and covered it in fondant which I coloured silver and green and blue. A special thank you to Merissa of Spring Lake Cake for her inspiring design. I think this might be the yummiest fish ever! Happy birthday, Andrew!

After covering the cake board with fondant (something I always do to ensure a beautiful finish), I carved it to look like a wooden planks. Next, I baked and layered a delicious strawberry cake; yellow cake with fresh strawberry slices, Swiss meringue buttercream and strawberry compote. I shaped the cake to look like a chubby trout and covered it in fondant which I coloured silver and green and blue. A special thank you to Merissa of Spring Lake Cake for her inspiring design. I think this might be the yummiest fish ever! Happy birthday, Andrew!
Wednesday, April 18, 2012
Pink Polka-Dot Cake with Smash Cake
Nicole wanted a special cake for Mya's first birthday and together we decided on a design to match the party decorations, pink on pink polka-dots.

After the party, Nicole sent me some pictures of Mya as she enjoyed her own personal smash cake.

I think she loved it!


After the party, Nicole sent me some pictures of Mya as she enjoyed her own personal smash cake.

I think she loved it!
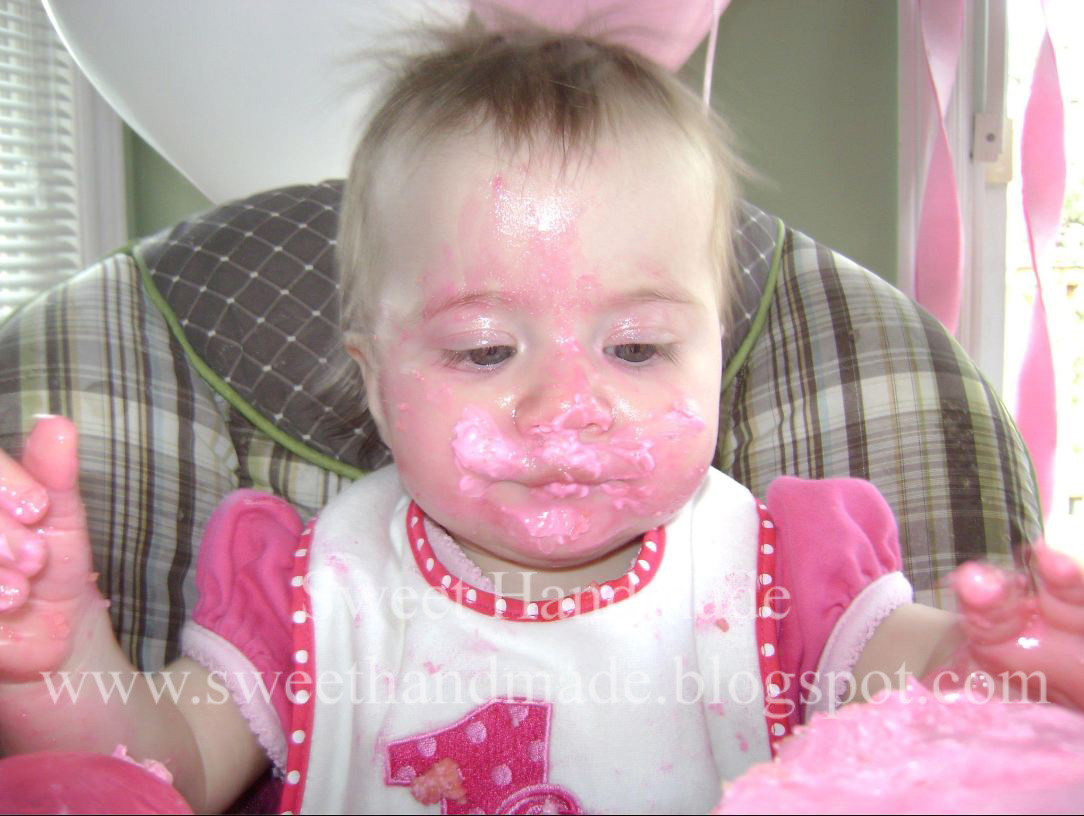
Every time I look at this picture I have to laugh!! What a sweetie!
Tuesday, March 27, 2012
Gum Paste Flower Cake and Cupcakes
This beautiful cake and cupcake tower was created for a retirement gathering. The cake was taken home by Joyce, the lucky retiree, while the 90 cupcakes were quickly devoured by her colleagues remaining on the job!

The tower consisted of red velvet cupcakes with cream cheese frosting, lemon poppy seed cupcakes with lemon curd and Swiss meringue buttercream as well as chocolate cupcakes with chocolate Swiss meringue buttercream. Every cupcake had a handmade gum paste leaf and flower. The cake was a chocolate cake with a filling of bittersweet ganache and chocolate Swiss meringue buttercream frosting. It was covered in handmade fondant and more than 50 gum paste buds and blossoms. I love how the cake resembled a spring hat. I loved the way it all came together and I wish Joyce many years of happiness and good health!

The tower consisted of red velvet cupcakes with cream cheese frosting, lemon poppy seed cupcakes with lemon curd and Swiss meringue buttercream as well as chocolate cupcakes with chocolate Swiss meringue buttercream. Every cupcake had a handmade gum paste leaf and flower. The cake was a chocolate cake with a filling of bittersweet ganache and chocolate Swiss meringue buttercream frosting. It was covered in handmade fondant and more than 50 gum paste buds and blossoms. I love how the cake resembled a spring hat. I loved the way it all came together and I wish Joyce many years of happiness and good health!
Friday, March 16, 2012
Leprechaun Hat Cake - repost
I've never met a leprechaun, I've never even been to Ireland, but I imagine
there are all different kinds of leprechaun personalities. The shy one, the
bold one, the happy one and the grumpy one. And then there would be the one who
would wear this jaunty little hat. I can only imagine he would walk with a
confident gait and have a magnetic personality to match! Maybe this March 17th
I will finally meet my first leprechaun. Can't wait to see what his hat looks
like! This hat is made of four delicious layers of brown sugar butter cake,
filled with caramel Swiss meringue buttercream and is covered with shamrock
green fondant. Happy St. Patrick's Day!


Wednesday, March 7, 2012
First Birthday Cake with Smash Cake
It seems like just yesterday that I made Chloe's baby shower cake. http://www.sweethandmade.blogspot.com/2011/05/baby-shower-cake.html Now she is one and I wanted to make her a special first birthday cake too! With whimsical flowers in pinks and reds, the adult tier on the bottom was chocolate/chocolate and the smash tier was vanilla/vanilla.

One popular new feature of a first birthday party is the "smash" cake. It means exactly what you think - the 1 year old gets the a small cake to smash at will. Chloe was a lady and kept things pretty neat, but did enjoy every bite! Happy birthday, sweet Chloe!


One popular new feature of a first birthday party is the "smash" cake. It means exactly what you think - the 1 year old gets the a small cake to smash at will. Chloe was a lady and kept things pretty neat, but did enjoy every bite! Happy birthday, sweet Chloe!

Friday, March 2, 2012
Wedding Reception Cake & Cookies
After a small and beautiful Cuban wedding at Christmas time, Sarie and Larry planned a reception closer to home for the family and friends who could not attend the wedding. Using their invitation as inspiration, I was asked to create a cake and bonbonnieres for their guests. This project was a labour of love and the gold and cream invitation provided a great jumping off point to create the two-tiered cake and matching cookies.


I achieved the golden flowers on the cake with fondant and royal icing and used 24 carat edible lustre dust to bring some sparkle to the cake.

For the cookies I used royal icing in various shades and used the 24 carat edible lustre dust on a few of the flowers' elements to bring in the sparkle. I wrapped each cookie in a celephane bag that I finished with a card thanking the guests. Wishing you a happy life together, Sarie and Larry!
Wednesday, February 22, 2012
Making your own fondant - a step-by-step tutorial
Fondant covered cakes are very popular and make for a beautiful finished cake. There are a variety of ready-to-use fondants on the market, that range from really delicious to much less so! Of course, the really delicious ones are not available to me locally. I live near, but not in Toronto, and any trip into the "city" takes a couple of hours out of my day. Sometimes that is more time than I am willing to spend for really good tasting fondant!
Since I have always had a make-your-own approach to food, I felt no different when I first started using fondant. I sourced an awesome recipe in The Cake Bible by Rose Levy Beranbaum and have been using it ever since. When I first tried the recipe I found it intimidating, but quickly realized it took about 20 minutes to put together, it has great elasticity and taste and it saves me a lot of time and money! A single batch of this recipe costs me less than $5 to make, the equivalent amount of store-bought fondant costs 2 - 3 times that much!
So today I created a tutorial on how I make fondant, I hope you enjoy!

 First I sprinkle 1 tablespoons of gelatin over 3 tablespoons of water and let it soften for about 5 minutes. While that is happening I measure out the rest of the ingredients, 1/2 cup corn syrup and 1 tablespoon of glycerin, as well as 2 tablespoons of shortening. I get a pot of water on the stove and bring it to a simmer. Next I measure out 920 grams of confectioners' sugar. Please note - if your confectioners' sugar is not fresh (clumpy), please sift it at this stage. My sugar is fresh, I use so much of it, that I don't usually need to sift it.

The next step I do before I move to the stove is to prepare the kneading area. I cover the area in shortening to prevent sticking.

I place the gelatin in a heatproof bowl over the simmering water. (I usually put it in the heatproof bowl right away, but today my thinking cap was off and I started it in a non-heatproof and had to transfer it - oops!) I stir the gelatin mixture as the water simmers underneath until the gelatin and water mixture has turned liquid.




Since I have always had a make-your-own approach to food, I felt no different when I first started using fondant. I sourced an awesome recipe in The Cake Bible by Rose Levy Beranbaum and have been using it ever since. When I first tried the recipe I found it intimidating, but quickly realized it took about 20 minutes to put together, it has great elasticity and taste and it saves me a lot of time and money! A single batch of this recipe costs me less than $5 to make, the equivalent amount of store-bought fondant costs 2 - 3 times that much!
So today I created a tutorial on how I make fondant, I hope you enjoy!

Here are the ingredients - corn syrup, shortening, unflavoured gelatin, water, glycerine and confectioners' (powdered) sugar. My trusty scale is also shown, a very important part of the process! Note - today I made a triple batch, I usually do a double.


The next step I do before I move to the stove is to prepare the kneading area. I cover the area in shortening to prevent sticking.

I place the gelatin in a heatproof bowl over the simmering water. (I usually put it in the heatproof bowl right away, but today my thinking cap was off and I started it in a non-heatproof and had to transfer it - oops!) I stir the gelatin mixture as the water simmers underneath until the gelatin and water mixture has turned liquid.

Then I add the corn syrup and glycerin.

Then I add the shortening in pieces (the smaller the pieces, the shorter amount of time it takes to melt).


The hot mixture is poured into the sugar and using your hands, mix it until it comes together. Some advice for this step - grease your hands with shortening. And I mean it - rub that stuff all over like it is the coldest, windiest winter day and you've not seen handcream in a month. I used to just grease my palms and fingers, but I've learned my lesson - now everything attached to my wrist is greasy!


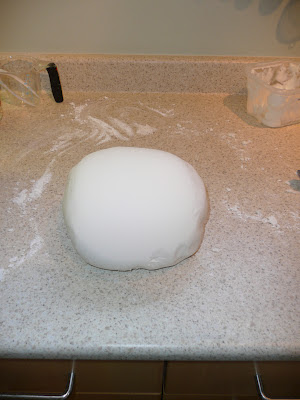
Once the mixture comes together (no photograph of that, sorry!) dump the mixture out onto the greased counter and start kneading.

Keep kneading until it is smooth and elastic and looks like this:

Package it in a zippered storage bag and rest for a few hours before using. It can be coloured to your heart's content! It is a wonderful recipe that produces a really terrific product. It has been a lifesaver more than once and I will continue to make it! I hope I took out some of the intimidation factor for you and hope you give it a try.
Here are a few of my cakes that I used my own fondant on - enjoy.

Subscribe to:
Posts (Atom)